

Once you've successfully installed osCommerce, the next step is to make your online store stand out with a unique theme and streamline your sales channels for optimal performance. In this blog post, we'll guide you through the process of assigning a new theme to a sales channel and removing any unnecessary ones. Let's dive in!
Assigning a New Theme to Your Sales Channel:
|
1. Accessing the Admin Area: After installing osCommerce, log in to your admin area by clicking on the "Admin" option. |
 |
|
|
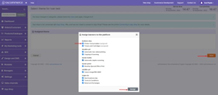
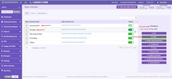
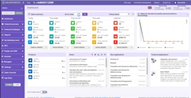
2. Navigating to Sales Channels: In the admin area, locate and click on the "Sales Channel" tab. 3. Viewing Available Sales Channels: Under the "Web" tab, you'll find a list of available sales channels. Identify the specific sales channel you want to customize and click on it. 4. Choosing the Theme: Once you've selected the desired sales channel, click on the "Choose theme" button. |
|
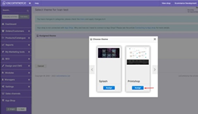
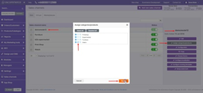
5. Assigning the New Theme: Browse through the available themes and select the one you wish to assign. Click on the "Assign" button next to the chosen theme. |
 |
|
|
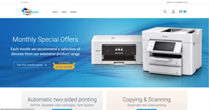
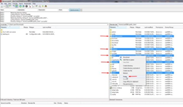
6. Configuring Banners: For a visually appealing storefront, you can customize banners. Assign the required banners to the sales channel and click on "Save." Congratulations! You have successfully assigned a new theme (Printshop, in our example) to your sales channel's front end. |

Removing Unnecessary Sales Channels:
|
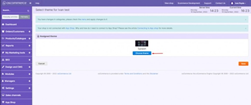
1. Navigating to Sales Channels: To remove unnecessary sales channels (excluding the default one), head back to the "Sales Channels" tab in the admin area. 2. Selecting the Sales Channel: Identify the sales channel you want to delete and click on it. 3. Removing the Sales Channel: Within the selected sales channel, locate and click on the "Delete" button. Confirm your action, and the sales channel will be removed. |
 |
 |
Note: Before deleting any sales channels, ensure that you have assigned the required categories and products to the default sales channel. To do this, click on the corresponding button and check the boxes next to the necessary categories/products. |
Securing Your Website:
|
1. Clearing the Installation Directory: For security reasons, remove the installation directory by using FTP access. Set up a connection to the server via your preferred FTP client. |
 |
 |
2. Deleting Symbolic Links: In addition to the installation directory, remove symbolic links associated with unnecessary sales channels. |
|
3. Refreshing the Page: Once you've completed these steps, refresh the page to ensure that the warning about the installation directory no longer appears. |
 |
Congratulations! You've successfully customized your osCommerce online store by assigning a new theme to a sales channel and streamlining your sales channels for improved efficiency. Your store is now ready to attract customers and showcase your products. With osCommerce's powerful features, you can further configure your website to create an outstanding shopping experience for your visitors. Happy selling!


