+44 2070601499

Managing Languages

In our interconnected world, catering to diverse audiences often involves supporting multiple languages on your website. To seamlessly manage this linguistic diversity, you need an intuitive approach. Here's how you can deftly handle languages on your website:


Step 1: Accessing the Admin Area

Begin by logging into your website's admin area. This is where you have control over settings and configurations.

Step 2: Configuring Languages

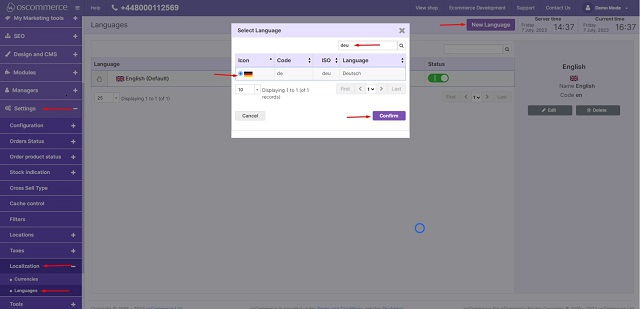
  1. Inside the admin area, locate and click on the "Settings," "Localization," and "Languages" tabs. These tabs contain the tools to manage your website's languages.
  2. Click the "New language" button to add a new language to your site.
  3. Find the language you need from the list, then select the radio button next to it. Finally, confirm your choice by clicking the "Confirm" button.


Step 3: Main Language Details

  1. Go to the "Main details" tab for the newly added language.
  2. Activate the language by toggling on the "Set Inactive" option.
  3. Choose the appropriate Locale for the language.
  4. Save your settings by clicking the "Update" button.

Step 4: Formats

Customize the required formats under the "Formats" tab according to your preferences.


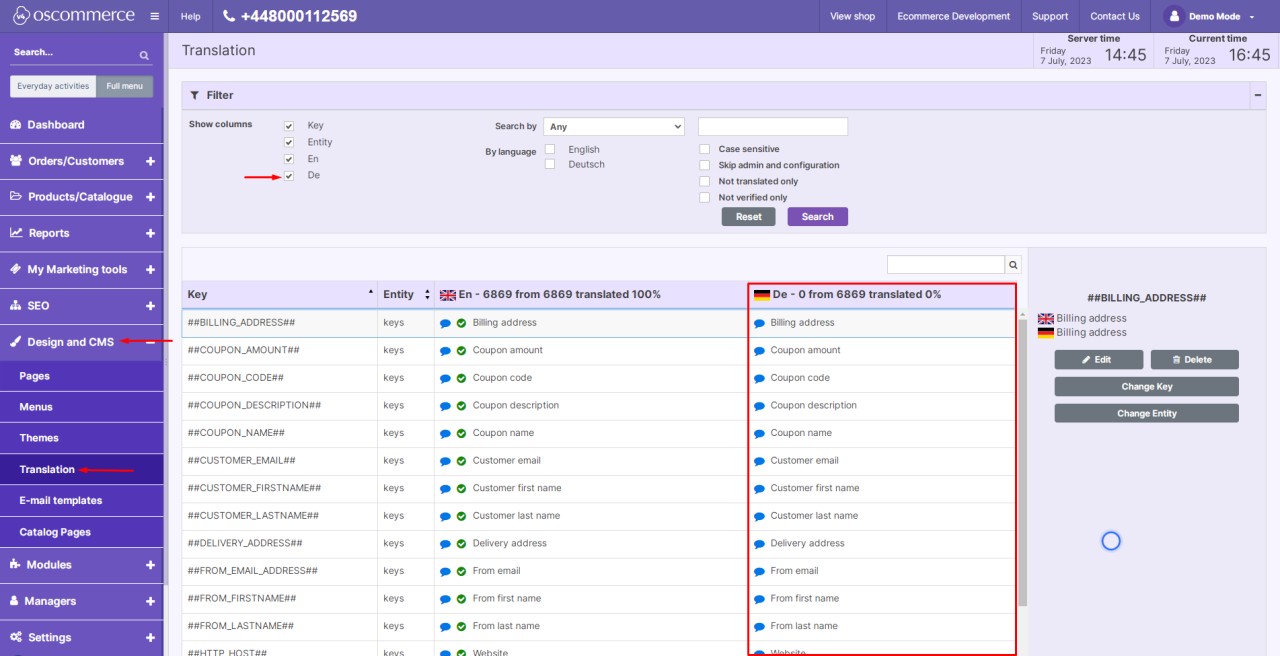
Step 5: Translating Content

  1. Move on to the "Design and CMS" and "Translation" tabs.
  2. Check the box next to the newly added language.
  3. By default, the system populates the keys with their English equivalents.


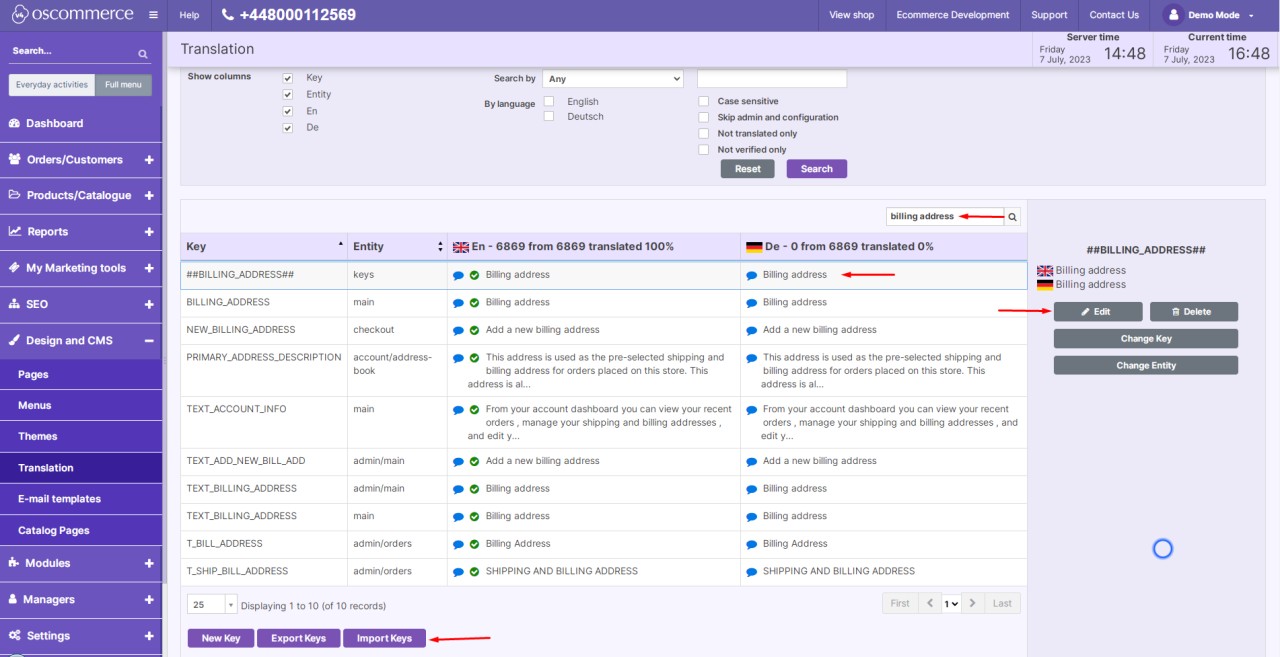
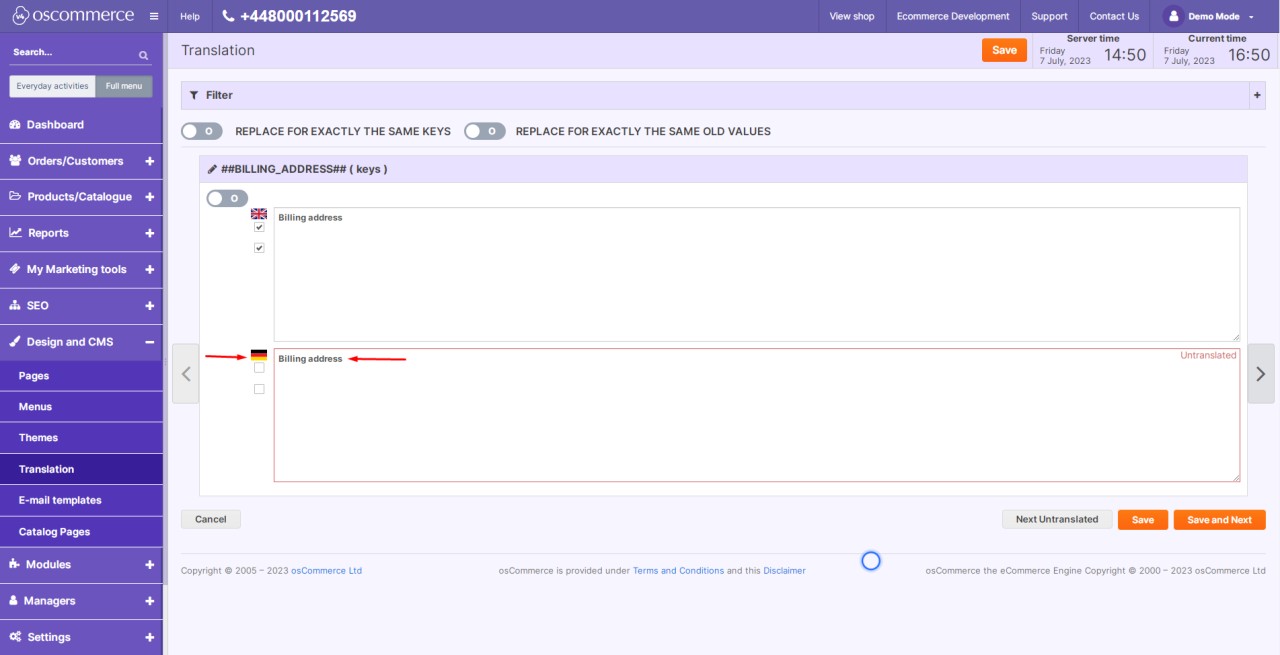
  1. You can either import keys in the desired language or manually translate them by clicking the "Edit" button next to each key.
 
 
  1. Fill in the necessary information next to the language icon.

Step 6: Configure Localization for Sales Channels

  1. Click on the "Sales channels" and "Web" tabs. Choose the relevant sales channel.
  2. Click the "Configure localization" button.
 
 
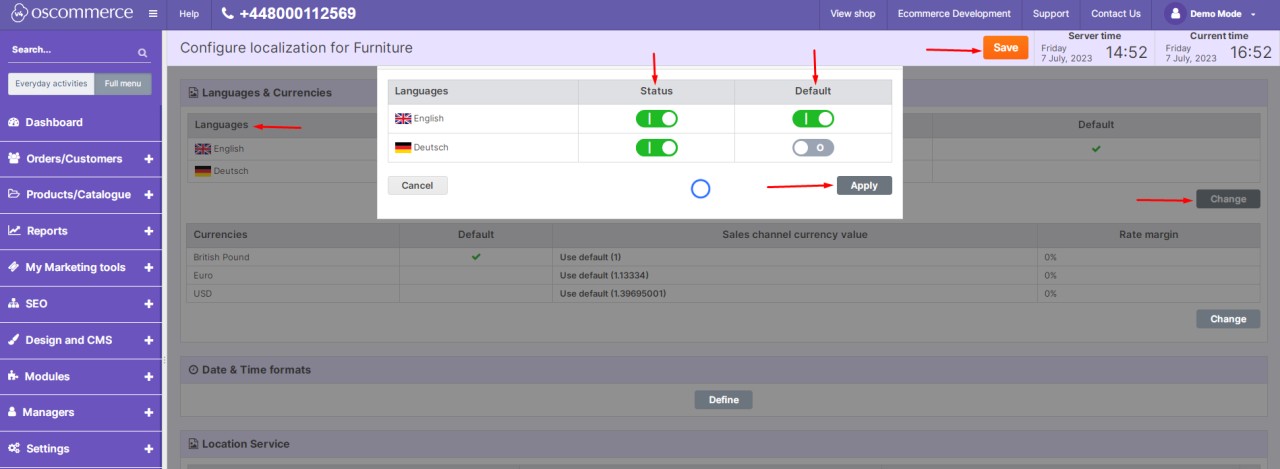
  1. In the "Language" section, click the "Change" button.
  2. In the popup window, activate the status for the new language and set it as default if needed.
  3. Apply your changes by clicking "Apply" and then "Save."

Step 7: Language in the Admin Area

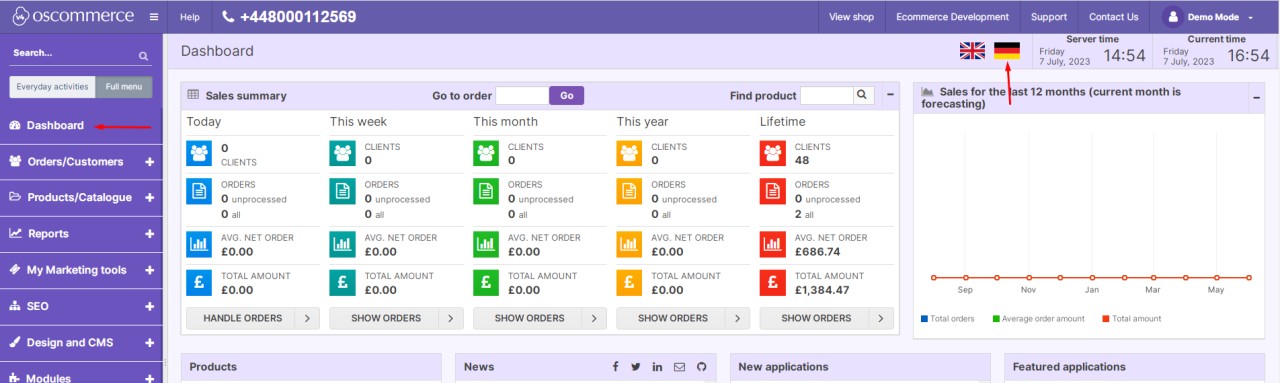
  1. If you want the newly added language to be available in the admin area as well, click on the "Dashboard" tab.
  2. Choose the required language icon.
 

By following these steps, you've successfully navigated the process of managing languages on your website. This enables you to engage with a wider audience, making your content accessible and comprehensible to users from different linguistic backgrounds.

Remember, creating a user-friendly multilingual experience enhances your website's reach and relevance, fostering meaningful connections with a global audience.


Recent posts
post item

Managing Counties and States

November 30, 2023
Managing Counties and States ...
post item

Managing Countries

November 29, 2023
Managing Countries ...
post item

Managing Filters

November 28, 2023
Managing Filters ...
post item

Managing Cache Control

November 27, 2023
Managing Cache Control ...
post item

Managing Cross Sell Type

November 24, 2023
Managing Cross Sell Type ...
post item

Managing Stock Delivery Terms

November 23, 2023
Managing Stock Delivery Terms ...
post item

Managing Notify Me when in Stock

November 22, 2023
Managing Notify Me when in Stock  ...
post item

Managing Stock Indication

November 21, 2023
Managing Stock Indication ...
post item

Managing Comment Templates

November 20, 2023
Managing Comment Templates ...
post item

Managing Order Statuses

November 17, 2023
Managing Order Statuses ...
Products
Tags

Management

Ecommerce

Integrations

launch

grant

fund

replatforming

osCommerce 4.x

shopping cart

hosting

Installation

New PayPal Module (Latest API 2.0)

osCommerce 2.2

osCommerce 2.3

Shopping cart customizations

Manually

PayPal Express

APM (Alternative Payment Method)

Standard Variant

Advanced Variant

Configuration

Testing

Front End

Install osCommerce for Me

Let me install myself

Multiple sales channels

Single active sales channel

Installation on your own server

Assigning theme to sales channel

Deleting sales channel

Connect

App Shop

Adding Free Module

Admin Area

Adding Paid Module

Installing Module

Opayo Pi Module

Development Mode

Email Verification Before Registration

Managing Languages

Managing phpMussel

Managing Orders

oscommerce.com account

Creating Manual Orders

Managing Customers

Managing Customer Groups

Managing Brands

Managing Categories

Managing Filters on Categories

Managing Products

Managing Stock

Assigning Products and Categories to Front Ends

Assigning and Moving Products to Categories

Managing Default Sort Order on Product Listing and Category

Managing Cross-Sell and UPSell

Managing Reviews

Managing Attributes

Managing Product Groups

Managing Properties

Managing Suppliers

Managing Warehouses

Managing Sales Statistics and Purchase Report

Managing Stocktaking Costs

Managing Deleted Orders

Managing Coupons

Managing Virtual Gift Cards

Managing Sales Price

Managing Giveaways

Managing Featured Products

Managing SEO

Managing Meta Tags

Managing XML Sitemap

Settings of E-commerce Tracking for Google Tag Manager

Setting up GA4

Managing Pages

Managing Menus

Assigning Theme to Sales Channels

Deleting Sales Channels

Managing Translations

Managing Email Templates

Managing Catalog Pages

Managing Shipping Modules

Managing Payment Modules

Managing Order Structure

Managing Socials

Managing Extensions

Managing Managers

Managing Access Levels

Managing Back End Menu

Managing Configuration

Mail Sending via SMTP

Setting up SMTP

Status Groups

Order Statuses

Comment Templates

Stock Indication

Notify Me when in Stock

Stock Delivery Terms

Cross Sell Type

Cache Control

Filters

Managing Countries

Managing Counties and States