

Are you looking to set up your own online store with multiple sales channels? osCommerce version 4.x provides a robust e-commerce solution that can be easily installed on your own server. In this guide, we'll walk you through the installation process, so you can get your online business up and running in no time.
|
Step 1: Download osCommerce 4.x To begin, head over to the official osCommerce website at https://www.oscommerce.com/ and click on the "Download your FREE Shopping Cart" button. This will download a zip file containing the necessary installation files. |
 |
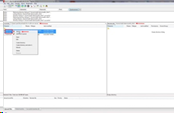 |
Step 2: Upload Files to Your Server Unzip the downloaded file and use your preferred FTP client to upload its contents to the "public_html" folder on your server. You can find more detailed instructions in the readme file provided. |
|
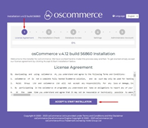
Step 3: Start the Installation Process Once the upload is complete, navigate to your website and click on the "Next" button on the "Unpacking Installation Files" page. From there, click "Accept and Start Installation" on the "License Agreement" page. |
 |
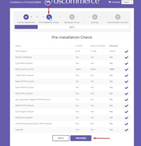 |
Step 4: Pre-Installation Check On the "Pre-installation Check" page, click the "Proceed" button to ensure your server meets all the requirements for osCommerce 4.x. |
|
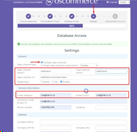
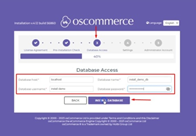
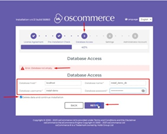
Step 5: Database Access Fill in the required fields for Database Access on the third step and click "Install Database" to set up your database.
Note: If you encounter an error, check the box next to "Delete data and continue installation" to clear your database and click "Retry." |
|
 |
Step 6: Configuration Settings On the fourth step, provide the necessary information and click "Update Database." You'll also have the option to choose between multiple sales channels or a single one from the drop-down list. By default, multiple sales channels are selected. |
|
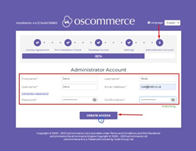
Step 7: Administrator Account Fill in the required fields on the fifth step to create the Administrator Account. Click "Create Access," and you'll receive an email with the login details and a link to access the administrator area. |
 |
 |
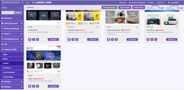
Step 8: Completing the Installation You can either click "To visit admin area click here" or "Complete Installation" to access the osCommerce Splash page with further information. Here, you can view all your installed sales channels and log in to the administrator area by clicking on the "Admin" option. |
|
Step 9: Final Configuration Once in the administrator area, click on the "Dashboard" tab. You'll notice a warning prompting you to remove the Installation directory for security reasons. Go ahead and remove it from the server. Refresh the page to confirm that the warning no longer appears. |
 |
|
|
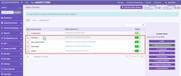
Step 10: Confirm Sales Channels and Themes Click on the "Sales channels" tab to verify that all four sales channels have been installed successfully. Similarly, check the "Design and CMS" and "Themes" tab to ensure all four themes are in place. |
Step 11: Configuration Complete!
Congratulations! OsCommerce 4.x is now installed on your server, and you've set up multiple sales channels for your online store. From here, you can further configure your website to meet your specific business needs.
With osCommerce's powerful features and user-friendly interface, you're well on your way to building a successful e-commerce business. If you encounter any issues or have questions, osCommerce's support and documentation can help you along the way.
Also see the link to the playlist below demonstrating the osCommerce version 4.x installation on your own server, Install osCommerce for me and Let me install myself options:
https://www.youtube.com/watch?v=XivAKdQTni8&list=PLHN7KfrDE8gOOTgXVSeFEo4L15Y98IURB
Start exploring the possibilities, and best of luck with your online venture! Happy selling!


