+44 2070601499

Managing Catalog Pages

Catalog pages are a powerful tool for organizing and displaying information effectively on your website. By strategically using catalog pages, you can create a seamless browsing experience for your visitors. In this blog post, we'll guide you through the process of managing catalog pages, allowing you to showcase specific blocks of information and link them to relevant pages. Let's explore the steps to optimize your website using catalog pages.

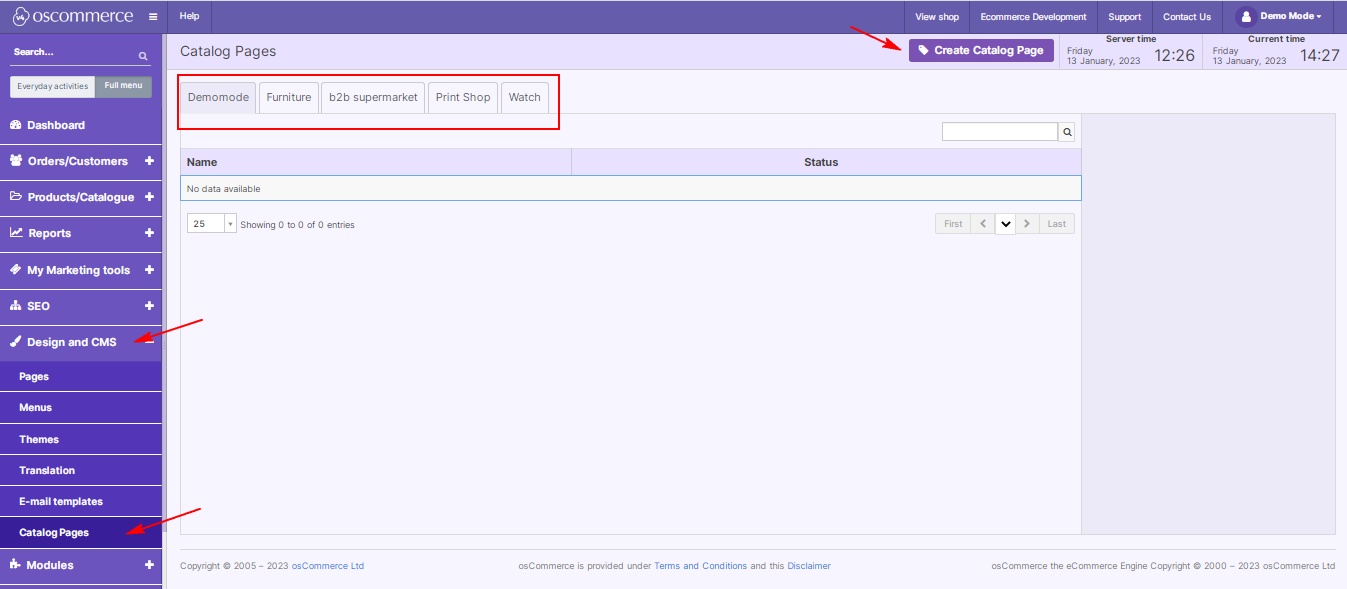
Step 1: Accessing the Admin Area Begin by logging into the admin area of your website. This is your gateway to enhancing your website's content and user experience.

Step 2: Navigating to Catalog Pages Once logged in, navigate to the "Design" and "CMS" sections, then click on the "Catalog Pages" tab. Here, you can create and manage catalog pages tailored to your specific needs, and assign them to the required sales channels.


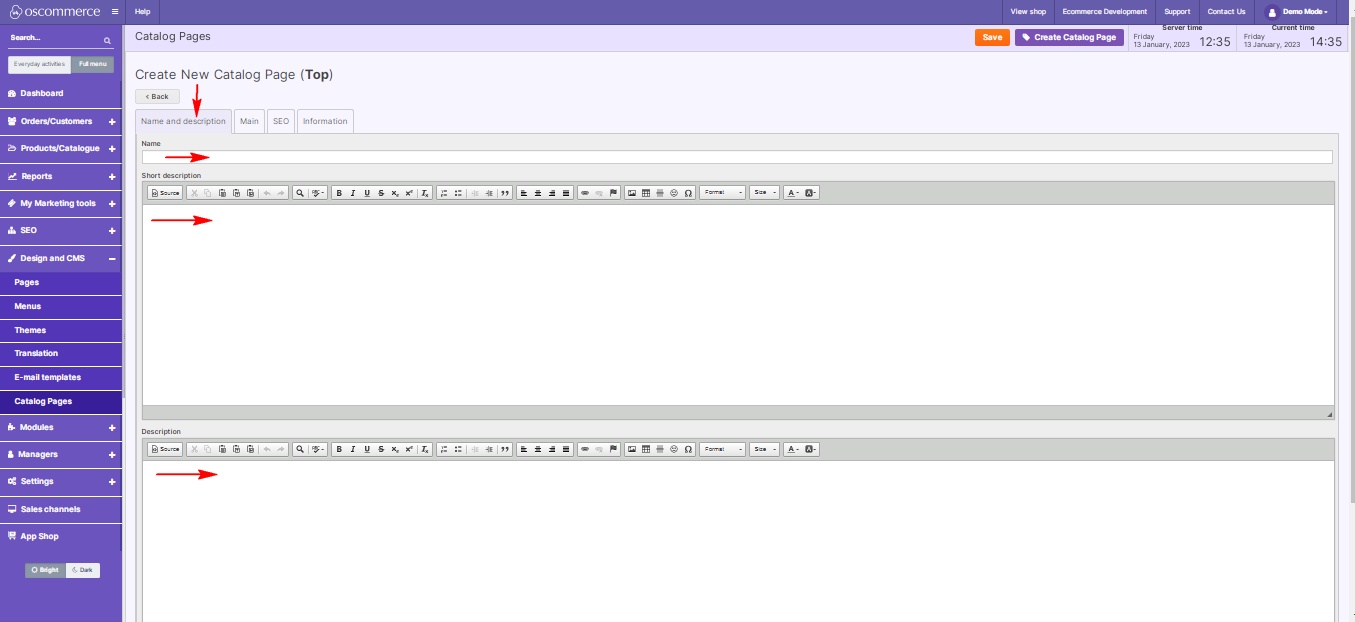
Step 3: Creating a New Catalog Page To create a new catalog page, click on the appropriate option. You can set its name, description, and a brief summary under the "Name and Description" tab. This information helps visitors understand the content of the catalog page at a glance.


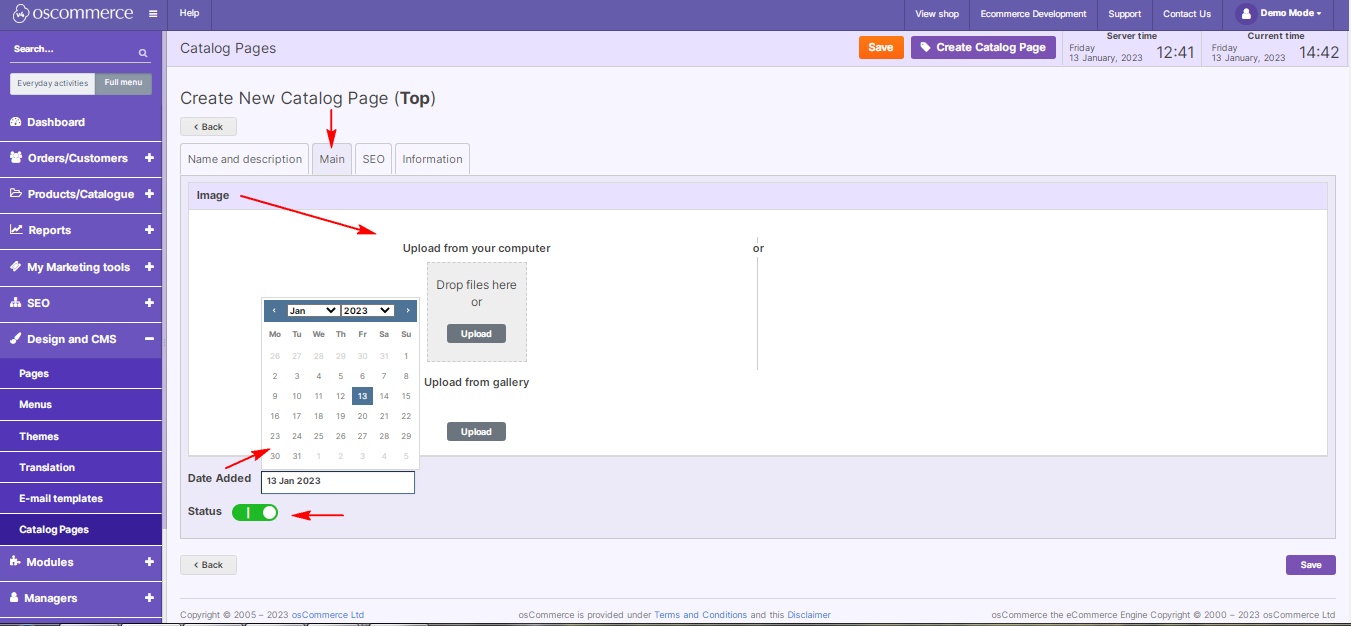
Step 4: Adding Visual Appeal Enhance your catalog page by adding compelling visuals. Move to the "Main" tab to upload an image, set its status, and specify the date it was added. Visual elements capture visitors' attention and make your content more engaging.


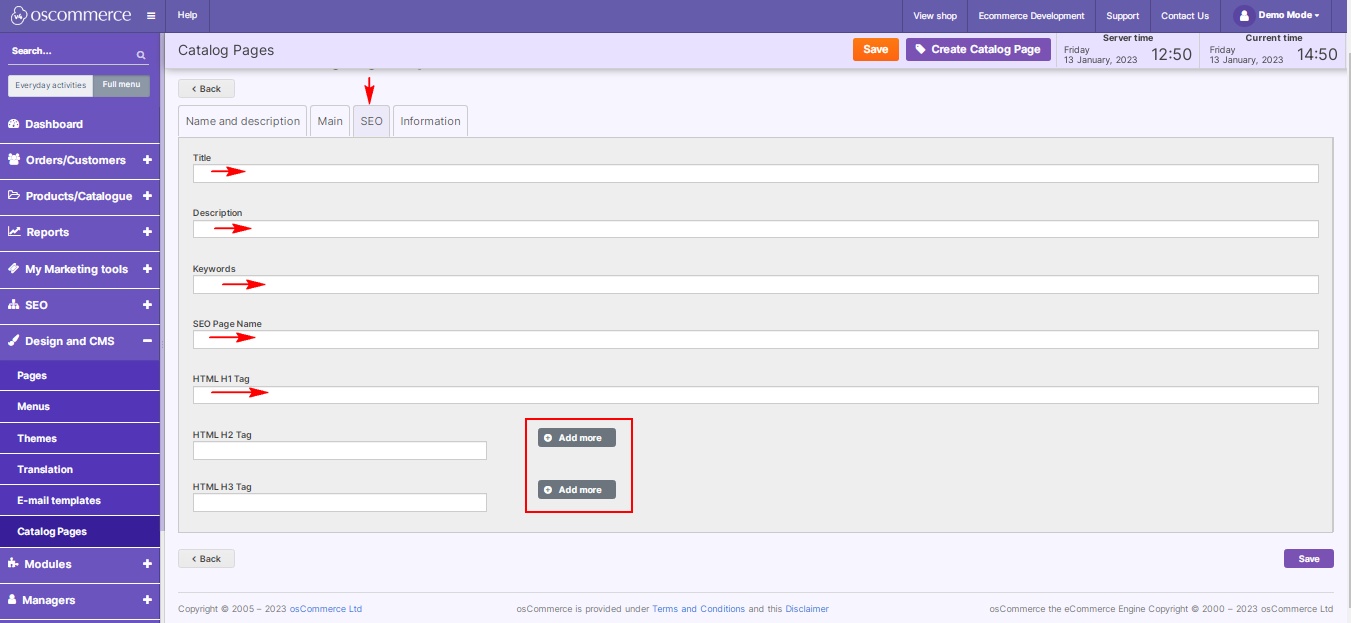
Step 5: Optimizing for Search Engines Boost the catalog page's visibility by optimizing its SEO settings. In the "SEO" tab, configure the SEO page name, title, and description. Add relevant keywords and set appropriate heading tags (H1, H2, H3). Multiple H2 and H3 can be added. Strategic SEO practices ensure your catalog pages are easily discoverable by search engines.


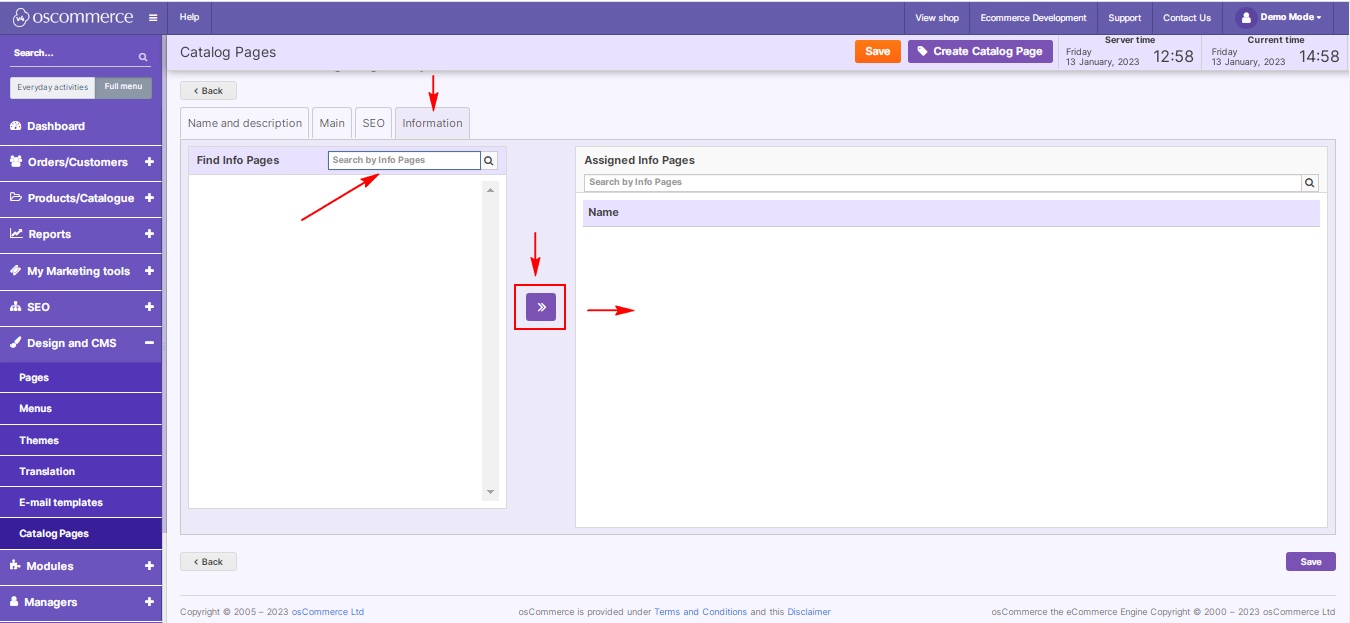
Step 6: Linking Information Pages Navigate to the "Information" tab to link relevant info pages to your catalog page. Utilize the "Find Info Pages" section to search for specific info pages. Choose the ones that align with your catalog page's content and assign them accordingly.


By following these steps, you can effectively manage catalog pages, providing your visitors with targeted, organized, and visually appealing information. Utilize this feature to enhance user experience and promote seamless navigation across your website. Happy catalog page management!

Recent posts
post item

Managing Counties and States

November 30, 2023
Managing Counties and States ...
post item

Managing Countries

November 29, 2023
Managing Countries ...
post item

Managing Filters

November 28, 2023
Managing Filters ...
post item

Managing Cache Control

November 27, 2023
Managing Cache Control ...
post item

Managing Cross Sell Type

November 24, 2023
Managing Cross Sell Type ...
post item

Managing Stock Delivery Terms

November 23, 2023
Managing Stock Delivery Terms ...
post item

Managing Notify Me when in Stock

November 22, 2023
Managing Notify Me when in Stock  ...
post item

Managing Stock Indication

November 21, 2023
Managing Stock Indication ...
post item

Managing Comment Templates

November 20, 2023
Managing Comment Templates ...
post item

Managing Order Statuses

November 17, 2023
Managing Order Statuses ...
Products
Tags

Management

Ecommerce

Integrations

launch

grant

fund

replatforming

osCommerce 4.x

shopping cart

hosting

Installation

New PayPal Module (Latest API 2.0)

osCommerce 2.2

osCommerce 2.3

Shopping cart customizations

Manually

PayPal Express

APM (Alternative Payment Method)

Standard Variant

Advanced Variant

Configuration

Testing

Front End

Install osCommerce for Me

Let me install myself

Multiple sales channels

Single active sales channel

Installation on your own server

Assigning theme to sales channel

Deleting sales channel

Connect

App Shop

Adding Free Module

Admin Area

Adding Paid Module

Installing Module

Opayo Pi Module

Development Mode

Email Verification Before Registration

Managing Languages

Managing phpMussel

Managing Orders

oscommerce.com account

Creating Manual Orders

Managing Customers

Managing Customer Groups

Managing Brands

Managing Categories

Managing Filters on Categories

Managing Products

Managing Stock

Assigning Products and Categories to Front Ends

Assigning and Moving Products to Categories

Managing Default Sort Order on Product Listing and Category

Managing Cross-Sell and UPSell

Managing Reviews

Managing Attributes

Managing Product Groups

Managing Properties

Managing Suppliers

Managing Warehouses

Managing Sales Statistics and Purchase Report

Managing Stocktaking Costs

Managing Deleted Orders

Managing Coupons

Managing Virtual Gift Cards

Managing Sales Price

Managing Giveaways

Managing Featured Products

Managing SEO

Managing Meta Tags

Managing XML Sitemap

Settings of E-commerce Tracking for Google Tag Manager

Setting up GA4

Managing Pages

Managing Menus

Assigning Theme to Sales Channels

Deleting Sales Channels

Managing Translations

Managing Email Templates

Managing Catalog Pages

Managing Shipping Modules

Managing Payment Modules

Managing Order Structure

Managing Socials

Managing Extensions

Managing Managers

Managing Access Levels

Managing Back End Menu

Managing Configuration

Mail Sending via SMTP

Setting up SMTP

Status Groups

Order Statuses

Comment Templates

Stock Indication

Notify Me when in Stock

Stock Delivery Terms

Cross Sell Type

Cache Control

Filters

Managing Countries

Managing Counties and States