+44 2070601499

Managing Products

Managing products on your website's admin area can be a multifaceted task, but it doesn't have to be overwhelming. In this detailed blog post, we'll take you through each step of the process, making it easier for you to handle your products efficiently.

Step 1: Accessing the Admin Area

Begin by logging into your website's admin area. This is where you'll have full control over your product management tasks.

Step 2: Navigating to Products/Catalogue and Products (Brands/Categories)

In the admin area, locate and click on the "Products/Catalogue" and “Products (Brands/Categories)” tabs. Here, you'll find a wide array of options that empower you to search and manage your products effectively.

Product Filtering Options:

  • Sales Channel: Filter products by their sales channel.
  • Product Attributes: Search products by name, description, category, product page title, product header description, keywords, SKU, EAN, ASIN, ISBN, UPC, product image name, and SEO page name.
  • Advanced Search Options: Expand your product search using filters such as brand, status, stock availability, low stock products, featured products, gift wrap option, virtual products, bundle products, products on sale, supplier, price, and weight.

Step 3: Product Management Functions

The "Products" tab offers various functionalities to streamline your product management:

  • Drag and Drop: Easily rearrange your product list with a simple drag-and-drop interface.
  • Toggle On/Off: Quickly enable or disable products as needed.
  • Add/Edit Products: Create new products or modify existing ones by clicking the respective buttons.

Step 4: Assign Products to Sales Channels

When adding or editing a product, use the "Assign/Restrict" tab to link it to multiple sales channels, ensuring your products reach a broader audience.

See guide: Assigning Products and Categories to Front Ends.

Step 5: Price and Cost Settings

Under the "Price and Cost" tab, configure various pricing and cost-related settings for your products:

  • Tax Class: Choose the appropriate tax class.
  • Pricing: Set net or gross prices, or base prices on cost from supplier information.
  • Additional Costs: Specify gift wrap surcharges, shipping surcharges, quantity-based price discounts, and more.
  • Recommended Retail Price (RRP): Indicate the suggested retail price for your products.

Step 6: Manage Product Suppliers

Within the "Suppliers (Cost)" section of the "Price and Cost" tab, efficiently manage your product suppliers:

  • Edit Supplier Details: Modify supplier information.
  • Add/Select Supplier: Easily add or select a new supplier.
  • Supplier Pricing: Set net prices and currencies, apply shop discounts, surcharges, and desired margins.

Step 7: Name and Description Customization

Under the "Name and Description" tab, fine-tune product names and descriptions:

  • Multilingual Support: Enter information in multiple languages.
  • Product Keywords: Enhance on-site search by including relevant keywords.
  • Display Across Sales Channels: Enable product visibility on all sales channels.

Step 8: Main Product Details

In the "Main Details" tab, manage essential product details:

  • Product Status: Set products as "active" or "inactive."
  • Stock Handling: Utilize options like "unlimited stock," "demo" designation, and configure identifiers like SKU, EAN, ASIN, UPC.
  • Brand Management: Work with existing brands or add new ones.

While creating or editing product details, it is also possible to:

  • Select product’s unit label name.
  • Mark product as “featured”.
  • Choose Google Shopping product type.

Using a drop down calendar, you can set date "available from" and date to keep product marked as “new” until.

Step 9: Stock Availability and Delivery Terms

Under the "Stock" section within "Main Details," control stock availability and delivery terms:

  • Stock Availability: Choose from real stock figures or predefined settings like "always in stock," "out of stock," and more.
  • Delivery Terms: Define delivery options based on stock availability or custom configurations.

Stock splitting option is also available in this section.

See guide: Managing Stock

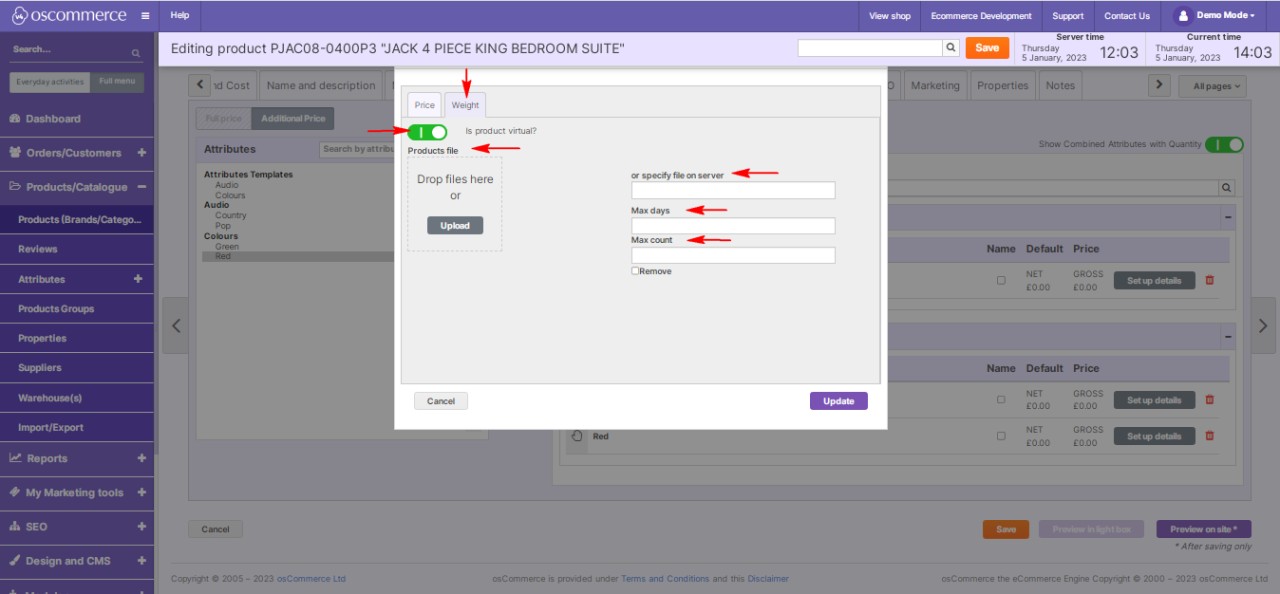
Step 10: Product Attributes and Inventory

In the "Attributes and Inventory" tab, assign attributes to products, specify their impact on pricing and weight, and manage virtual products with downloadable files.

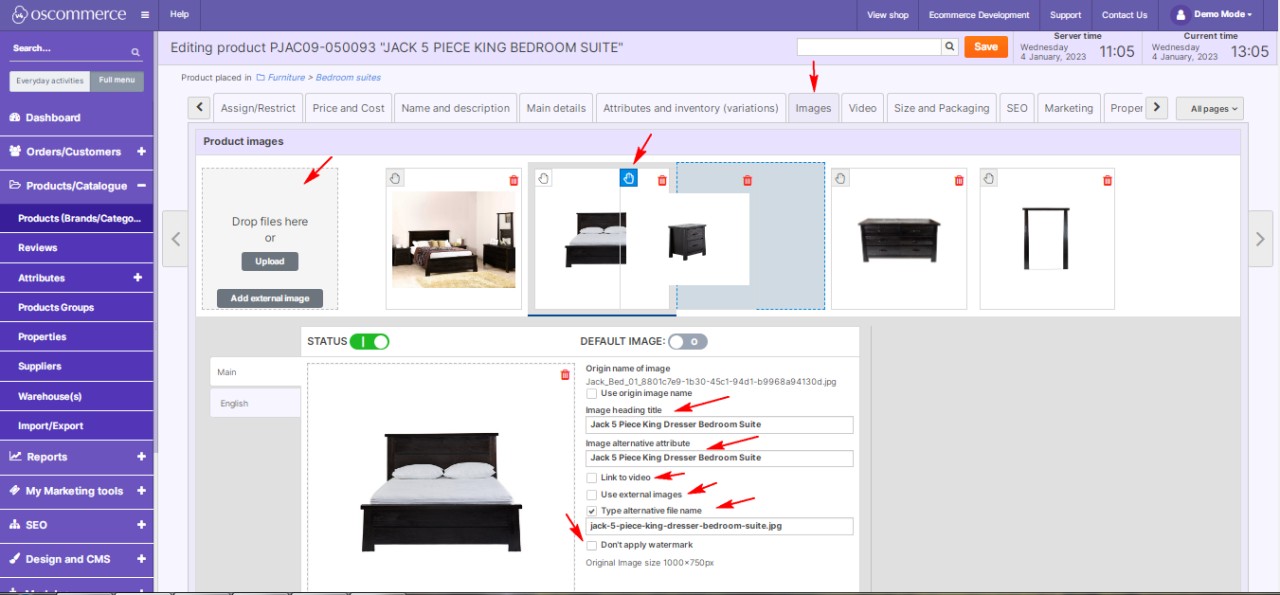
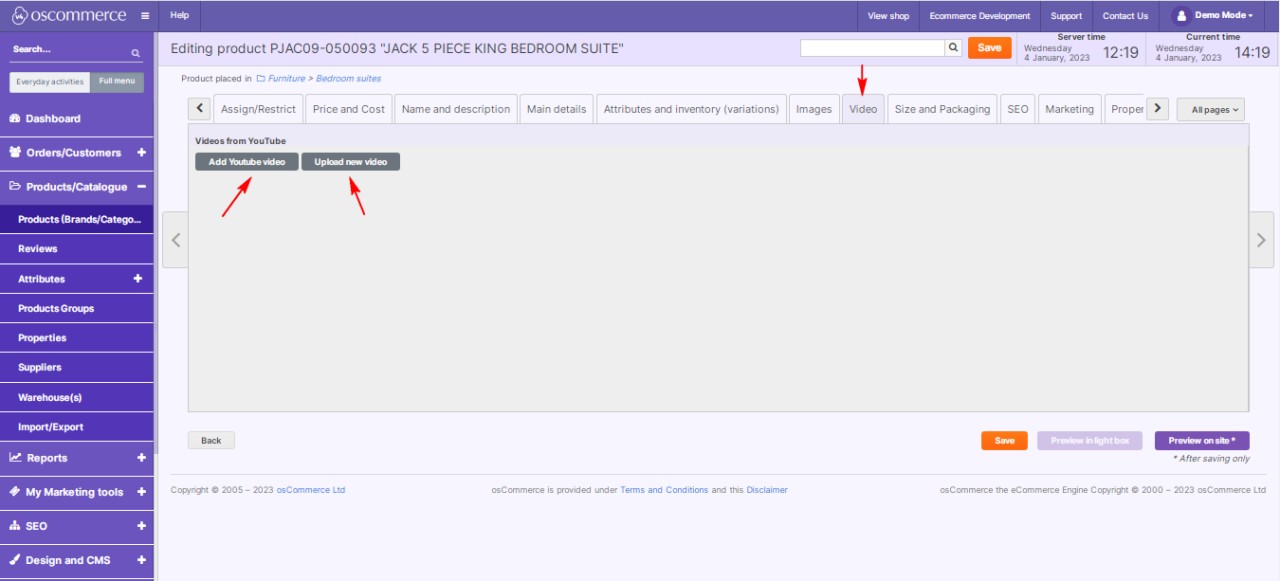
Step 11: Product Images and Videos

Use the "Images" and "Video" tabs to upload product images and videos, enhancing your product listings with SEO-friendly titles, ALT tags, and more.

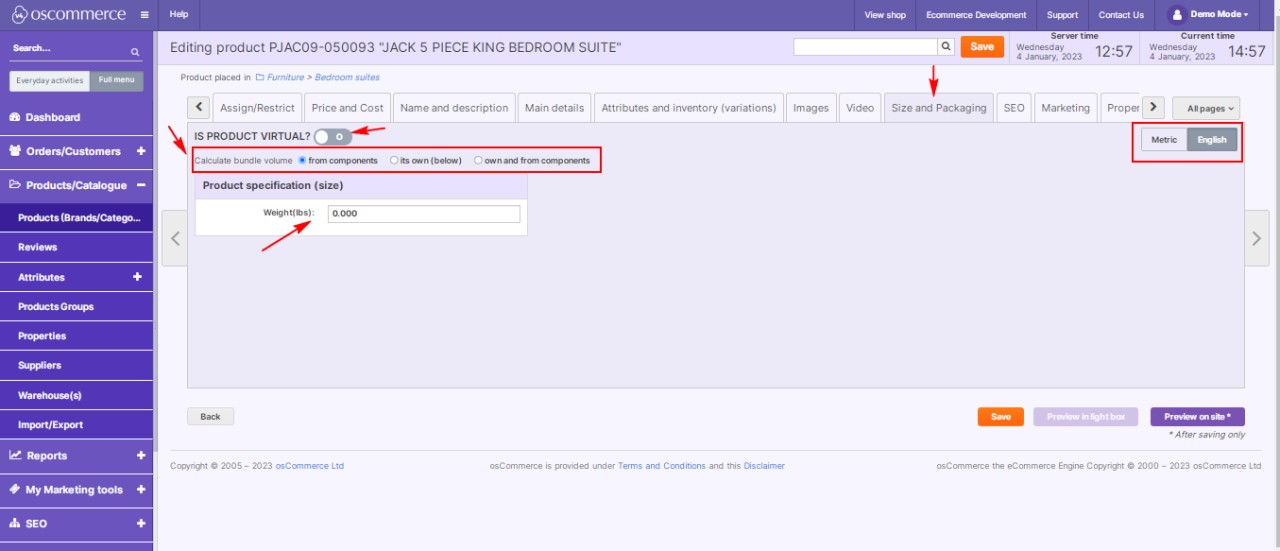
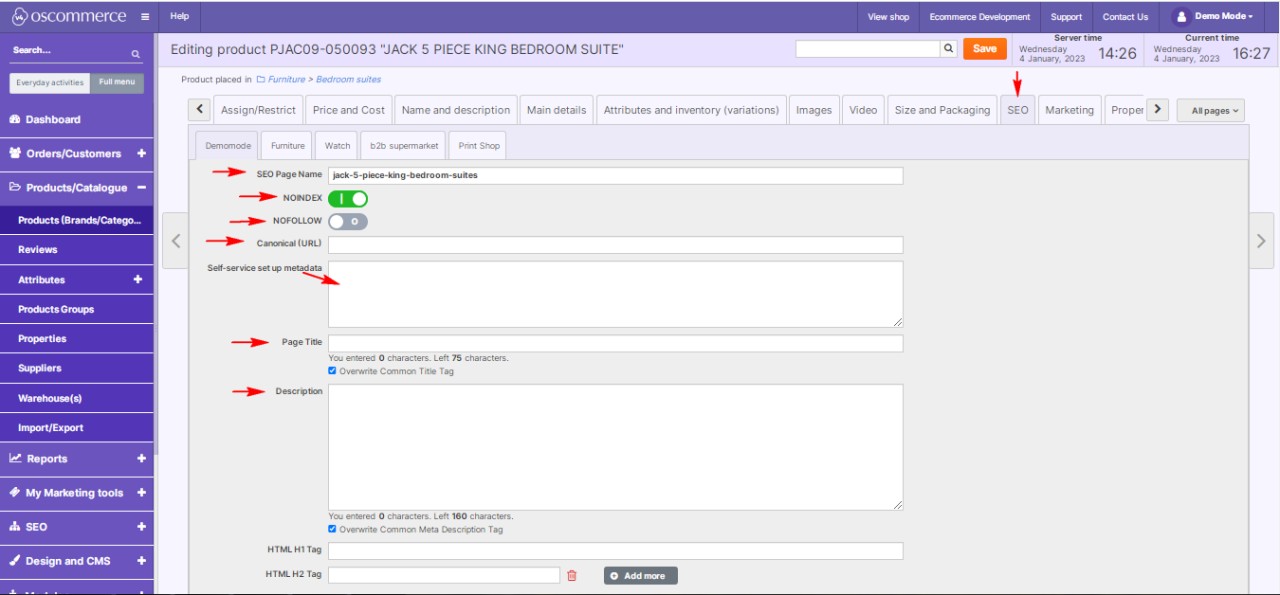
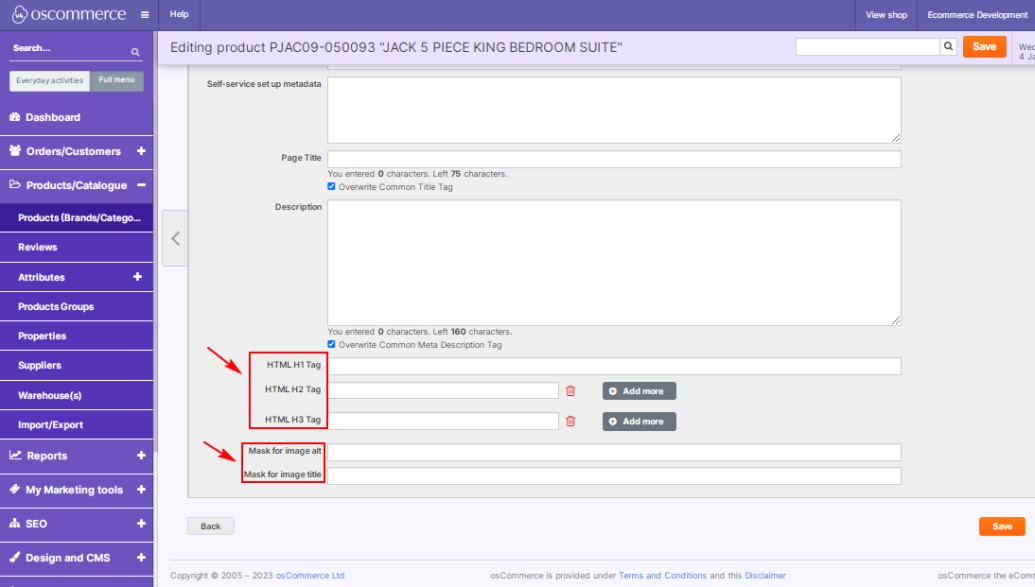
Step 12: Size, Packaging, and SEO Settings

Customize product size, packaging, and SEO settings in the respective tabs, ensuring your products are presented optimally and are search engine-friendly.

See also guide: Managing SEO

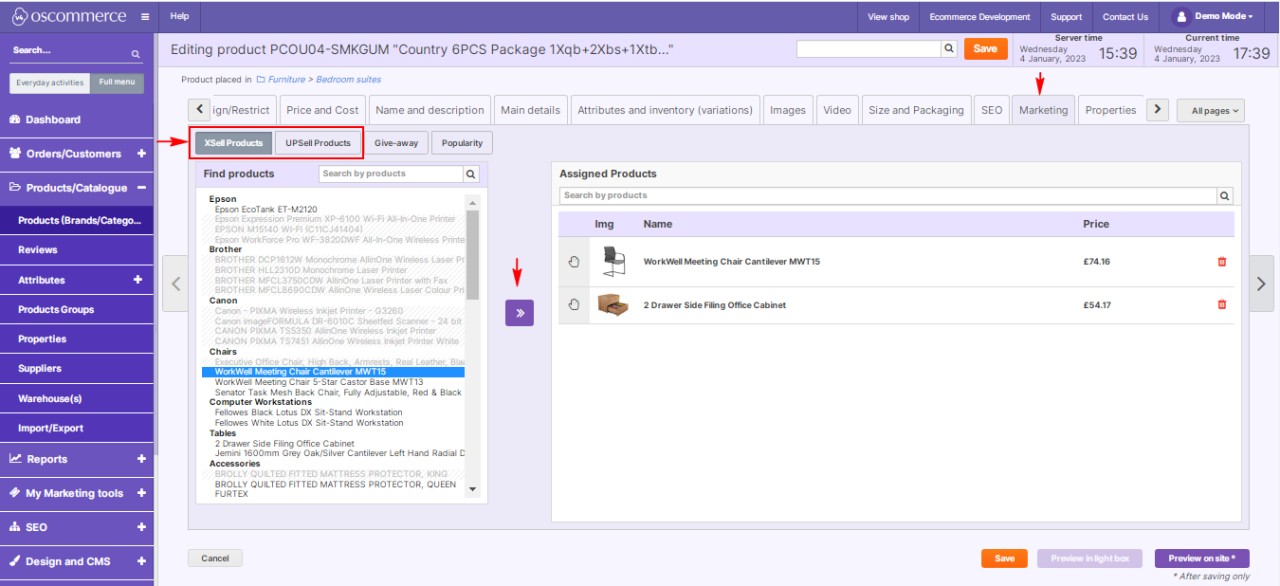
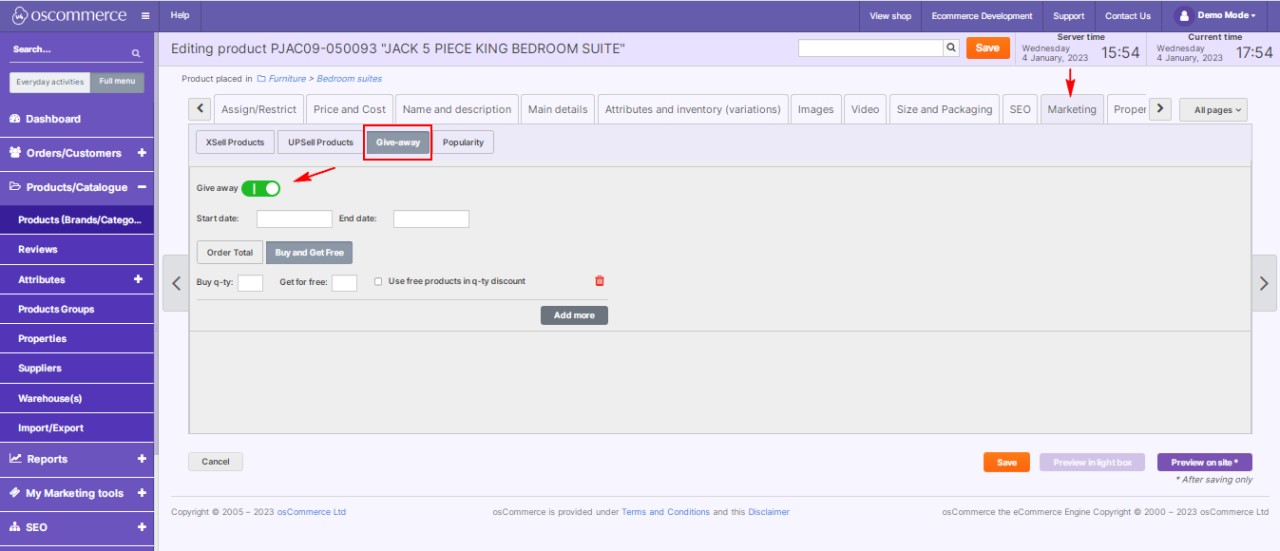
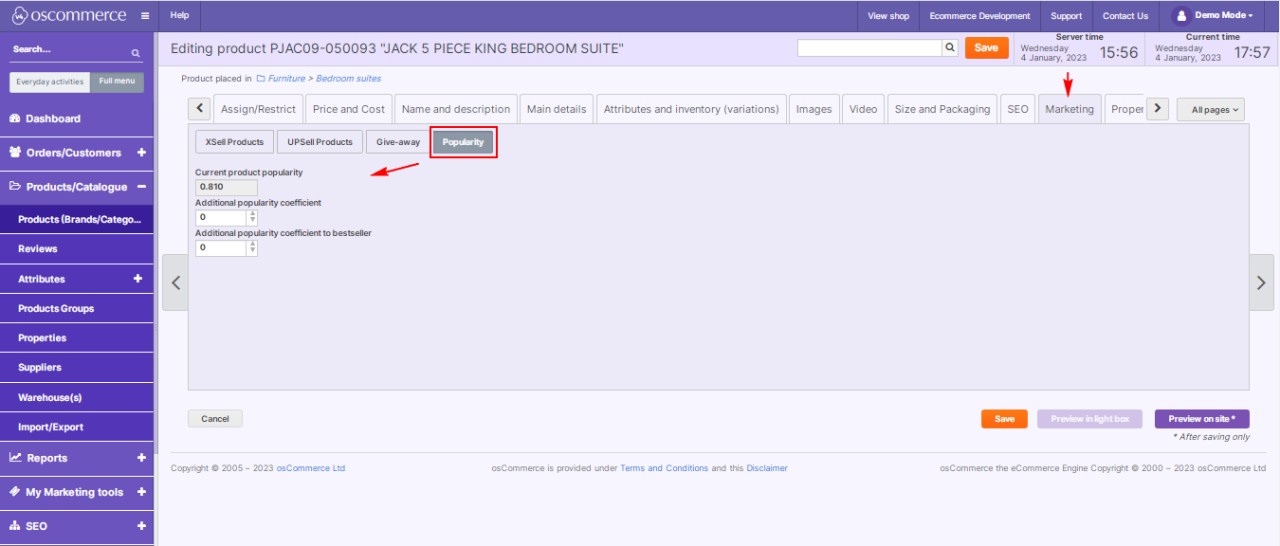
Step 13: Marketing and Promotion

Under the "Marketing" tab, explore options for linking upsell and cross-sell products and creating giveaways. You can also analyze product popularity coefficients.

See guide: Managing XSell and UPSell

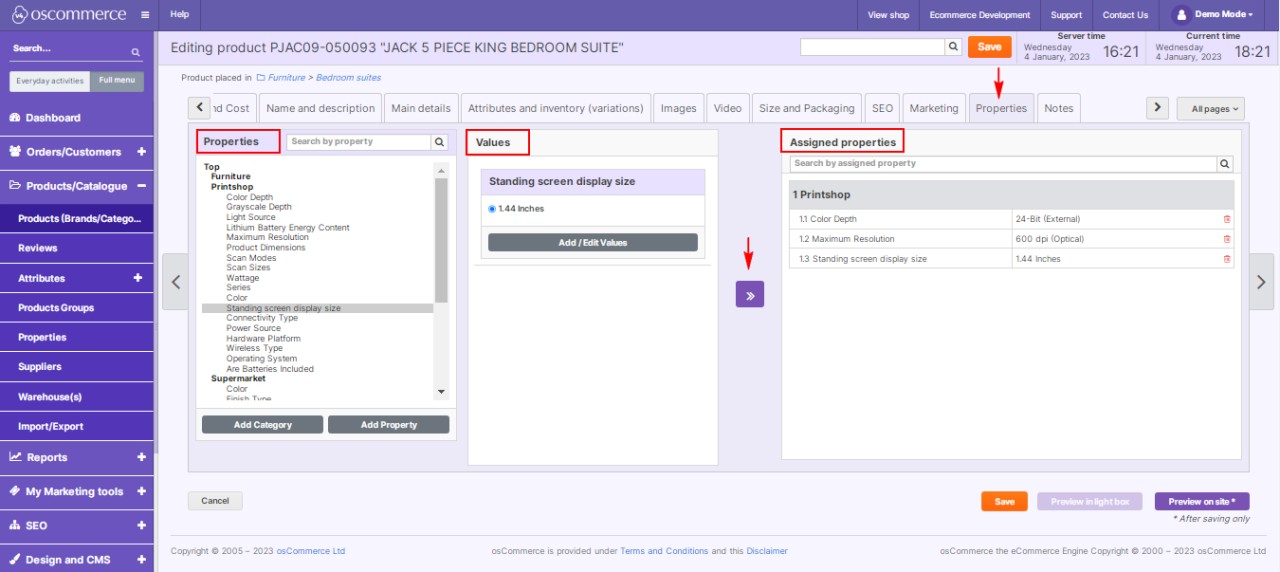
Step 14: Product Properties and Technical Descriptions

In the "Properties" tab, set product properties and values, creating a detailed technical description for your products.

See guide: Managing Filters on Categories

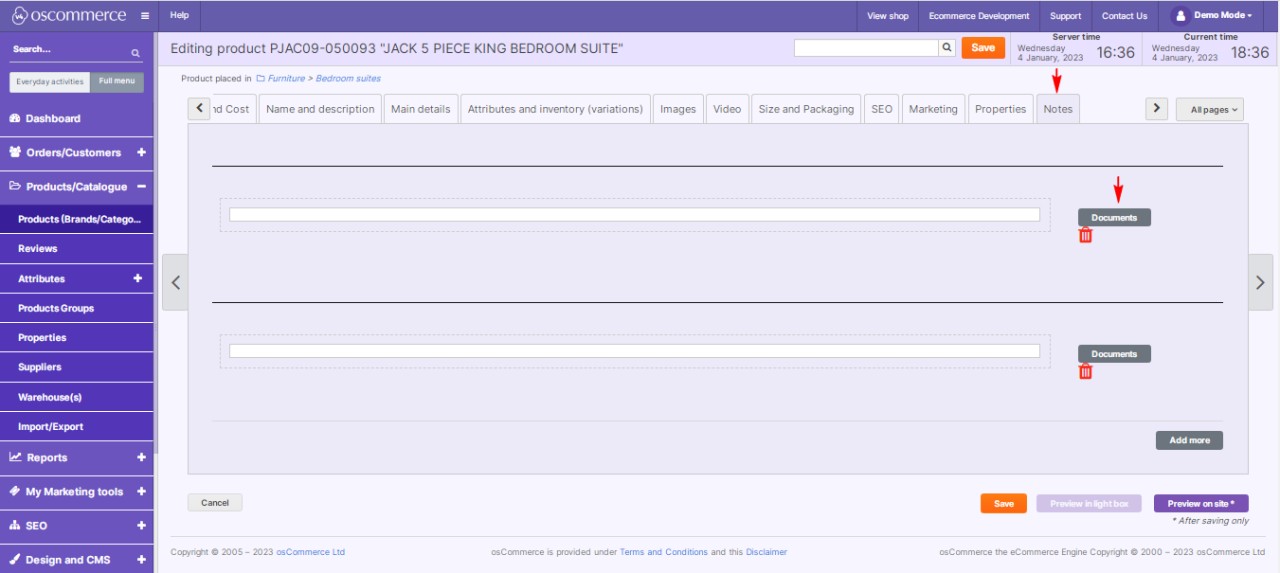
Step 15: Internal Product Notes

Finally, under the "Notes" tab, create and manage internal product notes for your reference.

With this comprehensive guide, you now have a thorough understanding of how to efficiently manage your products on your website's admin area. Streamline your processes, enhance your product listings, and optimize your customers' shopping experience. Happy product management!

Recent posts
post item

Managing Counties and States

November 30, 2023
Managing Counties and States ...
post item

Managing Countries

November 29, 2023
Managing Countries ...
post item

Managing Filters

November 28, 2023
Managing Filters ...
post item

Managing Cache Control

November 27, 2023
Managing Cache Control ...
post item

Managing Cross Sell Type

November 24, 2023
Managing Cross Sell Type ...
post item

Managing Stock Delivery Terms

November 23, 2023
Managing Stock Delivery Terms ...
post item

Managing Notify Me when in Stock

November 22, 2023
Managing Notify Me when in Stock  ...
post item

Managing Stock Indication

November 21, 2023
Managing Stock Indication ...
post item

Managing Comment Templates

November 20, 2023
Managing Comment Templates ...
post item

Managing Order Statuses

November 17, 2023
Managing Order Statuses ...
Products
Tags

Management

Ecommerce

Integrations

launch

grant

fund

replatforming

osCommerce 4.x

shopping cart

hosting

Installation

New PayPal Module (Latest API 2.0)

osCommerce 2.2

osCommerce 2.3

Shopping cart customizations

Manually

PayPal Express

APM (Alternative Payment Method)

Standard Variant

Advanced Variant

Configuration

Testing

Front End

Install osCommerce for Me

Let me install myself

Multiple sales channels

Single active sales channel

Installation on your own server

Assigning theme to sales channel

Deleting sales channel

Connect

App Shop

Adding Free Module

Admin Area

Adding Paid Module

Installing Module

Opayo Pi Module

Development Mode

Email Verification Before Registration

Managing Languages

Managing phpMussel

Managing Orders

oscommerce.com account

Creating Manual Orders

Managing Customers

Managing Customer Groups

Managing Brands

Managing Categories

Managing Filters on Categories

Managing Products

Managing Stock

Assigning Products and Categories to Front Ends

Assigning and Moving Products to Categories

Managing Default Sort Order on Product Listing and Category

Managing Cross-Sell and UPSell

Managing Reviews

Managing Attributes

Managing Product Groups

Managing Properties

Managing Suppliers

Managing Warehouses

Managing Sales Statistics and Purchase Report

Managing Stocktaking Costs

Managing Deleted Orders

Managing Coupons

Managing Virtual Gift Cards

Managing Sales Price

Managing Giveaways

Managing Featured Products

Managing SEO

Managing Meta Tags

Managing XML Sitemap

Settings of E-commerce Tracking for Google Tag Manager

Setting up GA4

Managing Pages

Managing Menus

Assigning Theme to Sales Channels

Deleting Sales Channels

Managing Translations

Managing Email Templates

Managing Catalog Pages

Managing Shipping Modules

Managing Payment Modules

Managing Order Structure

Managing Socials

Managing Extensions

Managing Managers

Managing Access Levels

Managing Back End Menu

Managing Configuration

Mail Sending via SMTP

Setting up SMTP

Status Groups

Order Statuses

Comment Templates

Stock Indication

Notify Me when in Stock

Stock Delivery Terms

Cross Sell Type

Cache Control

Filters

Managing Countries

Managing Counties and States