Managing TNT Express Shipping
April 04, 2024
Are you looking to integrate TNT Express shipping services into your website? This step-by-step guide will help you seamlessly set up and manage TNT Express Shipping through your website's admin area.
|
Step 1: Installation
- Log in to your website's backend and navigate to the admin area.
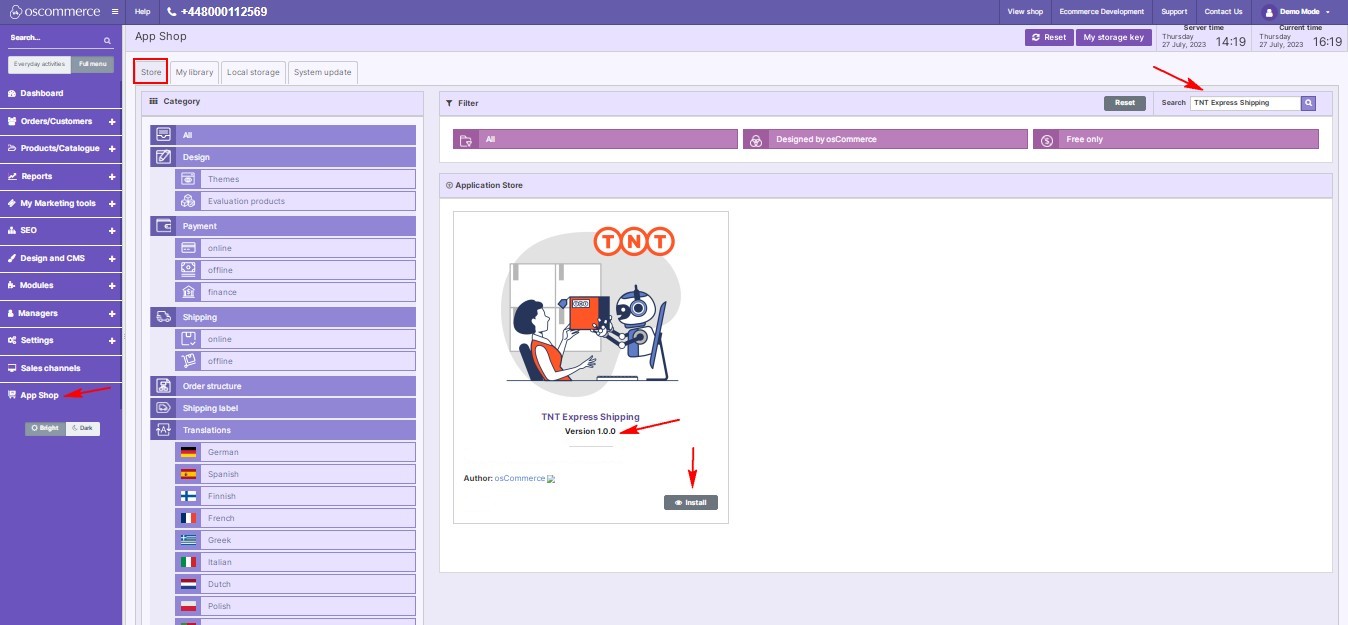
- Head to the "App Shop" and "Store" tabs to find the TNT Express Shipping module.
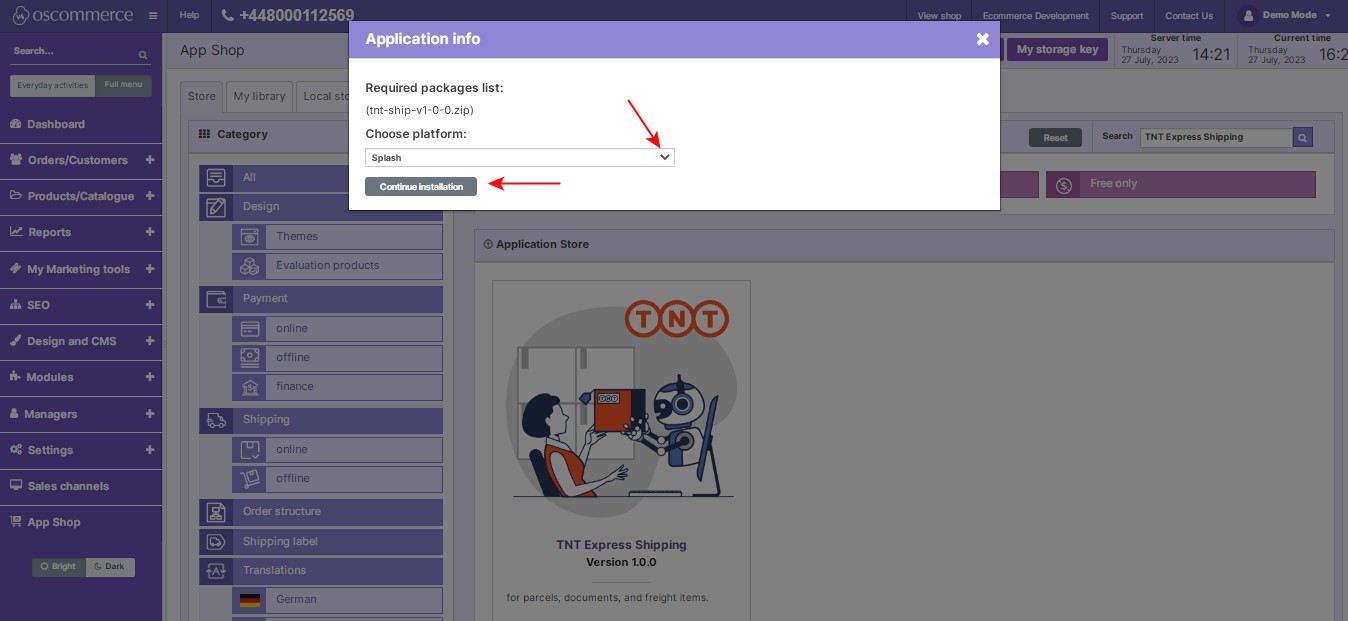
- Install the module by clicking on the "Install" button.
- Follow any on-screen prompts or instructions to complete the installation process.
|
|
|
|
Step 2: Customization
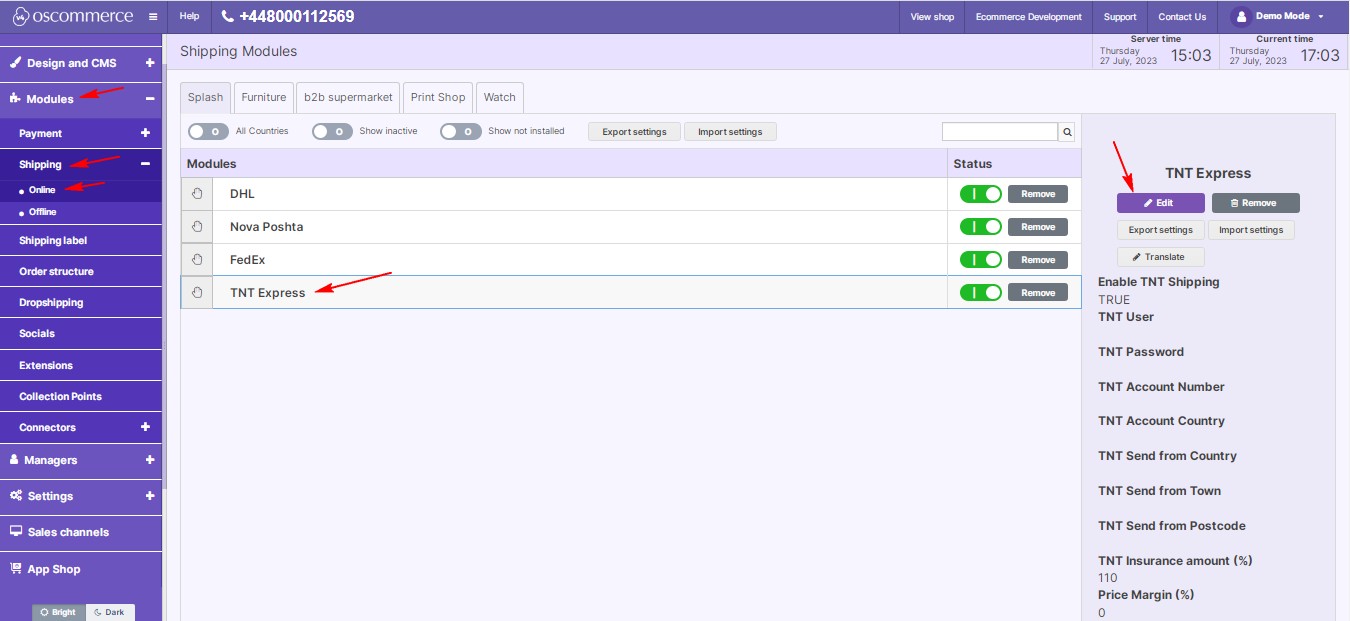
- After installation, go to the "Modules," "Shipping," and "Online" tabs.
- Access the TNT Express Shipping module settings by clicking on the “Edit” button.
|
|
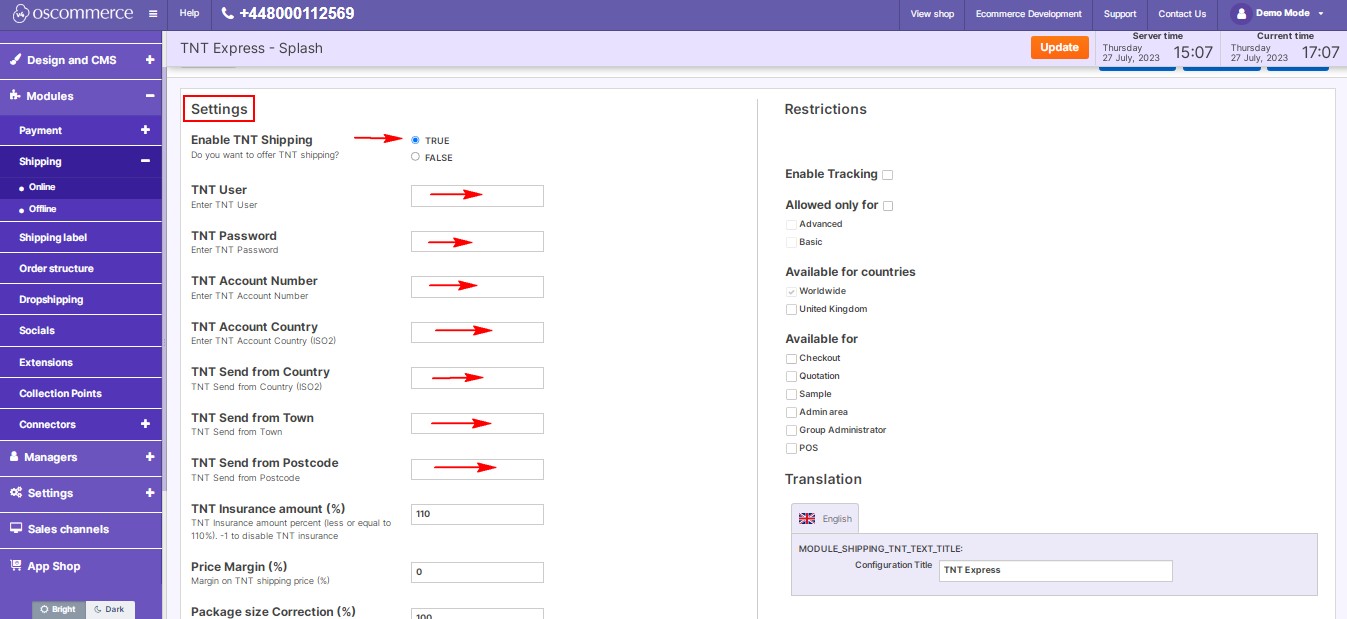
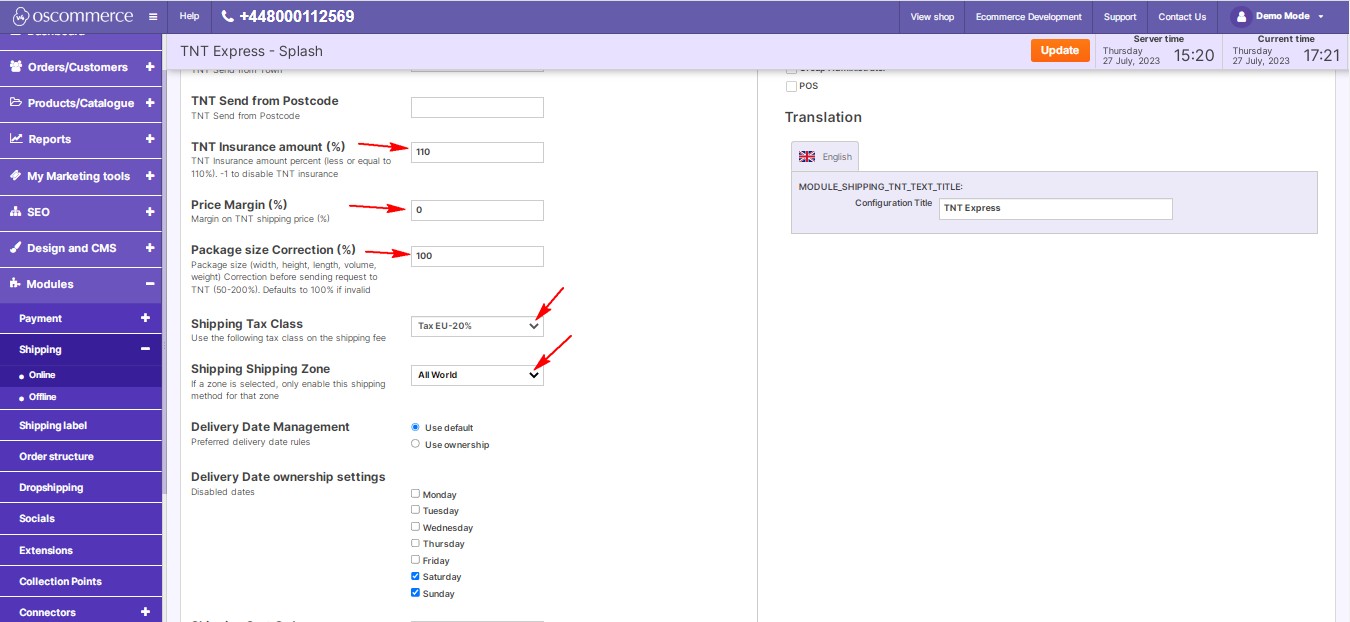
- Configure TNT shipping options by entering your TNT credentials and account details.
- Set up insurances, price margins, and shipping tax classes to match your business needs.
- Select the shipping zones where you want to offer TNT Express shipping.
|
|
|
|
Step 3: Manage Delivery Dates and Ownership Settings
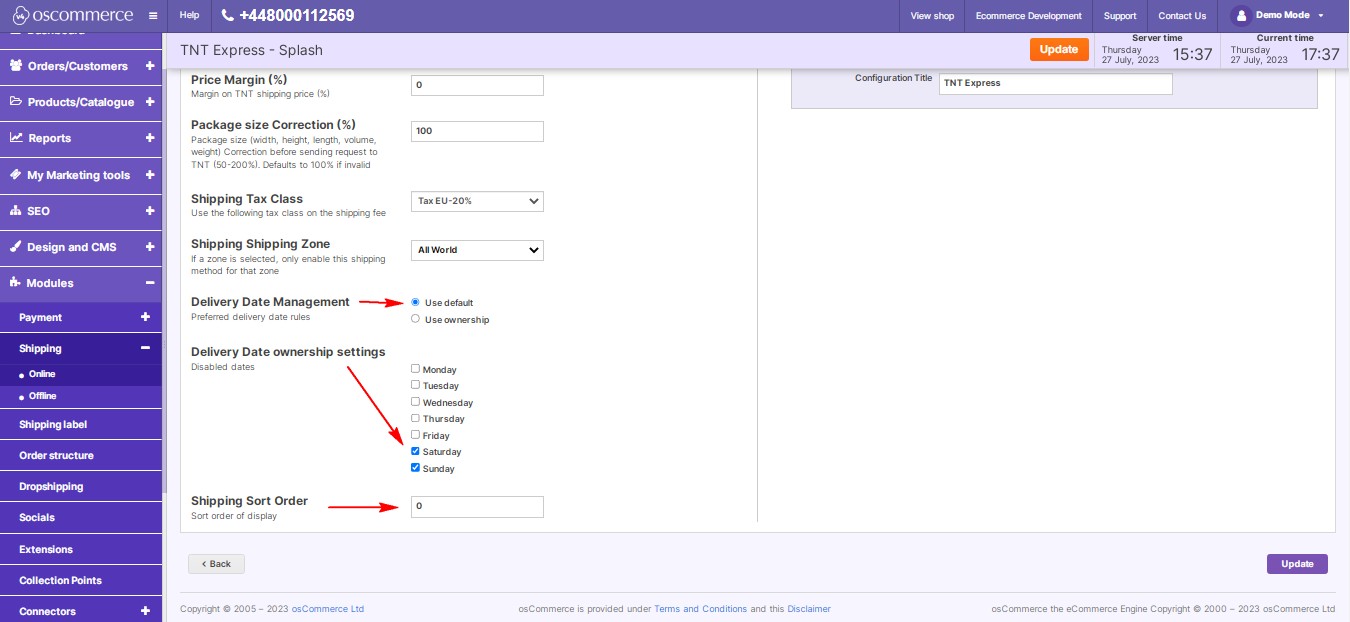
- Customize delivery dates and ownership settings according to your preferences.
- Select preferred delivery days and disable unwanted days.
Step 4: Set Shipping Display Order
- Control the order of shipping options displayed during checkout by adjusting priority values.
|
|
Step 5: Restrictions and Tracking
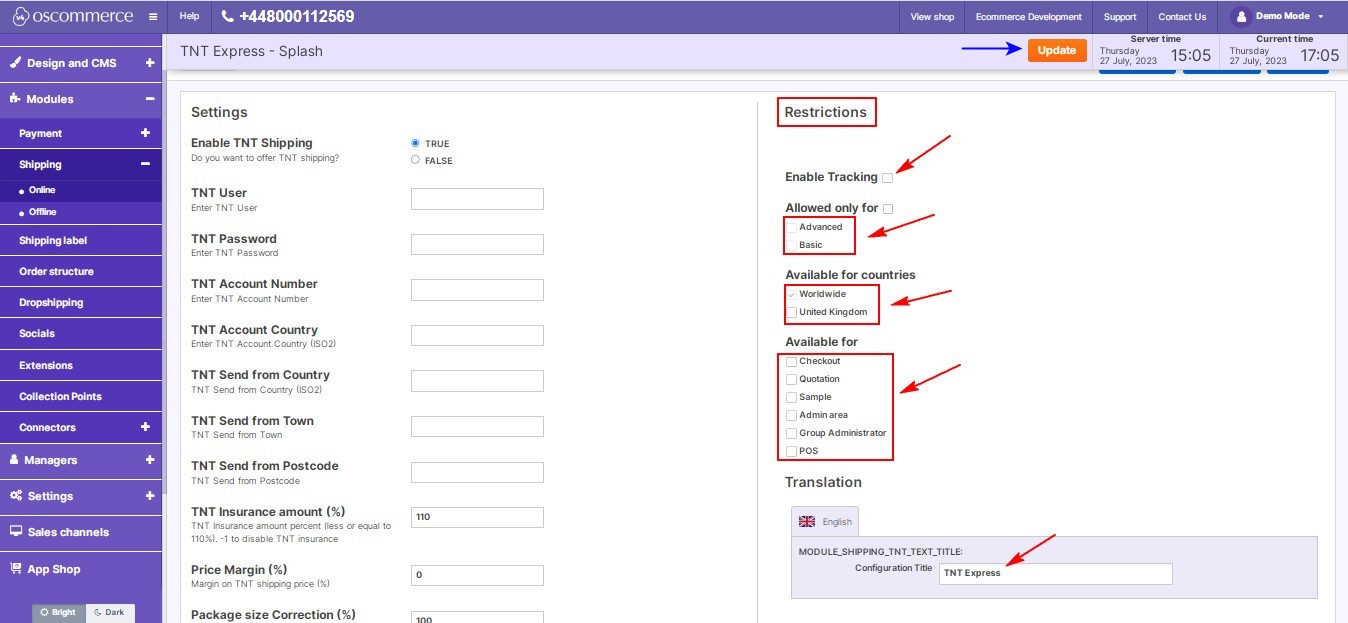
- Customize TNT Express shipping restrictions for specific customer groups, countries, and website pages.
- Enable tracking to provide shipment visibility to your customers.
- Specify the shipping module name for both the backend and front end in your desired language.
- Save your customization by clicking "Update."
|
|
With these simple steps, you can efficiently manage TNT Express Shipping on your website, offering your customers reliable and efficient shipping services.


